
Steaming milk is a crucial skill for creating café-style drinks at home, and with the Breville Barista Express, it becomes an enjoyable part of the coffee-making process. Let me walk you through everything I’ve learned about how to steam milk on the Breville Barista Express. By the end of this guide, you’ll be frothing milk like a pro.
Why Steaming Milk on the Breville Barista Express Is a Game-Changer
When I first got my Breville Barista Express, I was thrilled with the idea of making espresso drinks at home, but steaming milk was a challenge I had to master. The built-in steam wand on this machine is powerful and versatile, making it ideal for beginners and seasoned coffee enthusiasts alike.
Steaming milk on this machine elevates your coffee experience, allowing you to create creamy lattes, frothy cappuccinos, and more. If you're considering an upgrade, you might be curious how the Breville Barista Express stacks up against newer models like in the Breville Barista Express Impress vs Pro comparison, which highlights the latest advancements in Breville’s lineup.
Getting to Know Your Steam Wand
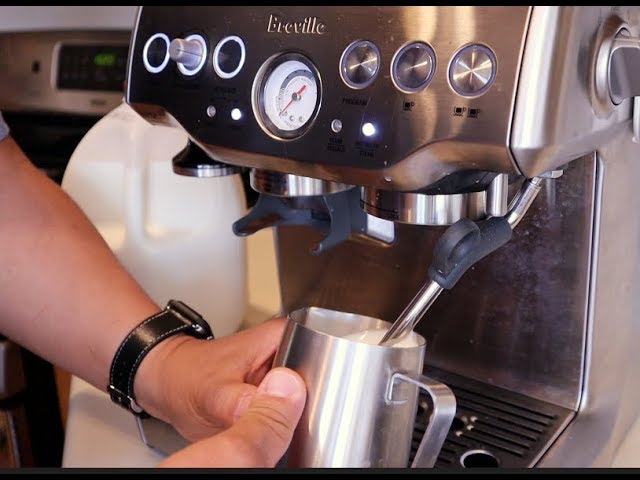
Before diving into the process of steaming milk, it’s important to familiarize yourself with the steam wand on the Breville Barista Express. The wand is located to the right of the group head and is designed for easy handling. It has a swivel motion, which makes it convenient to position at different angles.
Here’s what you need to know about the steam wand:
- Steam knob: This is used to control the steam pressure. Turning it counterclockwise activates the steam function.
- Tip design: The steam wand’s single-hole tip is ideal for creating microfoam.
- Cleaning: Always wipe the wand with a damp cloth and purge it after every use to maintain hygiene and functionality.
If you're looking for a more advanced steam wand experience, Breville’s higher-end models like the Breville Oracle vs Oracle Touch come with automated milk steaming, making it even easier to achieve the perfect texture.
Preparing Your Milk and Pitcher
Steaming milk on the Breville Barista Express starts with the right preparation. Here’s what I’ve learned works best:
- Choose the right milk: Whole milk is ideal for achieving creamy microfoam, but you can also use plant-based options like oat milk or almond milk. Just note that they may require slightly different techniques.
- Use a stainless steel pitcher: A pitcher with a spout is essential for pouring latte art and controlling the flow of milk.
- Fill to the right level: Fill the pitcher about one-third full. Overfilling can lead to spillage, while underfilling may not give you enough milk for frothing.
For those who want a more high-tech brewing experience, the Breville Barista Touch Impress offers pre-programmed milk steaming settings, making it even easier to get perfect microfoam with minimal effort.
How to Steam Milk on the Breville Barista Express Step-by-Step
Now, let’s get to the main event: how to steam milk on the Breville Barista Express. Here’s a detailed breakdown of the process:
Step 1: Preheat the Steam Wand
Before steaming milk, it’s essential to purge the steam wand. Turn the steam knob briefly to release any residual water. This ensures you’re starting with dry steam, which is crucial for creating quality microfoam.
Step 2: Position the Wand
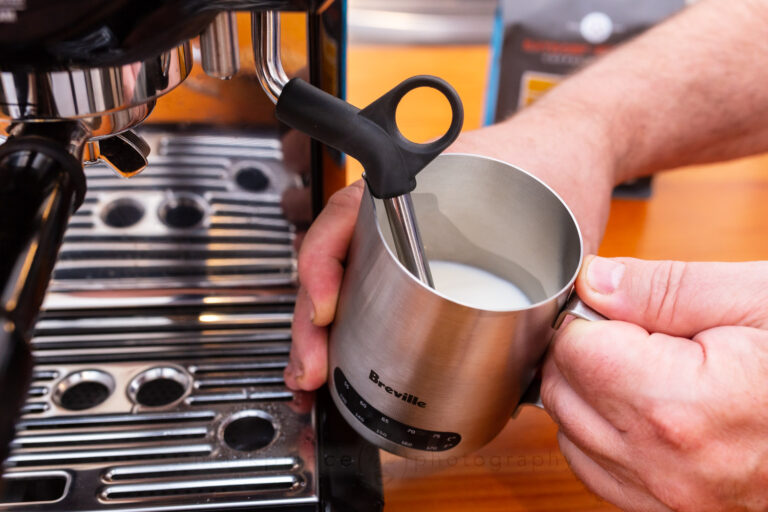
Submerge the steam wand into the milk, positioning it just below the surface. The tip should be at an angle, which helps create a whirlpool motion during steaming.
Step 3: Start Steaming
Turn the steam knob counterclockwise to start steaming. Focus on two phases:
- Stretching the milk: Begin with the tip just under the surface. This introduces air into the milk, creating the frothy texture. You’ll hear a subtle “chirping” sound when you’re doing this correctly.
- Texturing the milk: After stretching, fully submerge the wand and tilt the pitcher to create a whirlpool effect. This smooths out the milk, giving it a velvety consistency.
Step 4: Monitor the Temperature
The ideal temperature for steamed milk is around 150–160°F (65–70°C). You can use a thermometer or simply rely on touch; when the pitcher becomes too hot to hold for more than a few seconds, the milk is ready.
Step 5: Turn Off the Steam and Clean
Once the milk reaches the desired temperature, turn the steam knob off before removing the pitcher. Immediately wipe the wand with a damp cloth and purge it to remove any milk residue.
Perfecting the Microfoam
Creating microfoam is the hallmark of a well-steamed milk. The Breville Barista Express makes this achievable with practice. Microfoam is a silky, textured milk with tiny bubbles that blends perfectly with espresso.
Here are a few tips I’ve picked up:
- Keep the steam wand’s tip at the surface longer for a frothier consistency.
- For flat whites or lattes, spend more time in the texturing phase for a smoother finish.
- Swirl the milk in the pitcher after steaming to eliminate any remaining bubbles.
For those who want enhanced steaming control, machines like the Breville Dual Boiler BES920XL offer commercial-grade steam wands, allowing for even finer microfoam control.
Common Mistakes When Steaming Milk on the Breville Barista Express
When I first started, I made plenty of mistakes, but learning from them helped me improve. Here are some common issues and how to avoid them:
- Milk too hot: Overheating milk can scorch it, resulting in a burnt taste. Always aim for the recommended temperature range.
- Excessive froth: This often happens when too much air is introduced during stretching. Adjust the wand’s position to fix this.
- Lack of foam: This could mean you’re not keeping the tip near the surface long enough. Listen for that “chirping” sound to guide you.
Cleaning and Maintenance for Optimal Performance
Regular cleaning is vital for keeping your Breville Barista Express in top shape. After every use:
- Wipe down the steam wand with a damp cloth.
- Purge the wand to clear any milk residue.
- Periodically soak the steam wand in a cleaning solution to prevent buildup.
Steamed Milk Recipes to Try on Your Breville Barista Express
Once you’ve mastered steaming milk on the Breville Barista Express, you can explore a range of drinks:
- Cappuccino: Equal parts espresso, steamed milk, and foam.
- Latte: A shot of espresso topped with steamed milk and a small layer of foam.
- Flat White: Espresso with smooth microfoam, focusing on a creamy texture.
Each of these drinks allows you to showcase your milk steaming skills while experimenting with latte art.
If you're deciding between models, the Breville Barista Pro vs Express comparison can help you determine which machine fits your needs best.
Troubleshooting Milk Steaming Issues
If you’re still struggling with how to steam milk on the Breville Barista Express, here are some troubleshooting tips:
- No steam pressure: Check that the machine is properly heated. The steam function won’t work until the light indicates it’s ready.
- Uneven milk texture: This can be fixed by adjusting the angle of the steam wand or spending more time in the texturing phase.
- Burnt taste: Always purge the steam wand to ensure dry steam, and avoid overheating the milk.
Why Mastering Milk Steaming Matters
Steaming milk isn’t just about technique—it’s about enhancing your coffee experience. Whether you’re making a quick morning latte or impressing guests with a cappuccino, understanding how to steam milk on the Breville Barista Express adds a layer of craftsmanship to every cup.

Conclusion
Steaming milk on the Breville Barista Express is a rewarding skill that elevates your coffee game. From mastering the steam wand to creating creamy microfoam, this machine makes it accessible for anyone to craft barista-quality drinks at home.
With patience and practice, you’ll not only learn how to steam milk on the Breville Barista Express but also gain confidence in your ability to replicate your favorite café beverages. Whether it’s a rich cappuccino or a smooth flat white, the possibilities are endless once you’ve perfected this art.
Frequently Asked Questions About Milk Steaming
Why do I get large bubbles in my milk?
Large bubbles can be caused by over-aerating the milk or positioning the wand incorrectly. Try keeping the wand slightly submerged and introduce air only during the initial phase of steaming.
Which milk is best for steaming?
Whole milk provides the richest, creamiest foam, but barista-grade oat milk is an excellent alternative for plant-based options.
How can I tell if my milk is at the right temperature?
When the jug becomes too hot to hold for more than a second, the milk has reached around 150°F (65°C). A thermometer will give you more precise control.
Why is purging the steam wand necessary?
Purging the steam wand removes any leftover milk and moisture, ensuring that only dry steam is used for the perfect foam.
Can plant-based milk be used for latte art?
Yes! Barista-grade oat or almond milk can produce foam suitable for latte art, allowing you to create beautiful designs with your plant-based beverages.