
When it comes to creating café-quality drinks at home, steaming milk is a fundamental skill. If you’re like me and love a perfectly frothy latte or a velvety cappuccino, mastering how to steam milk on the Breville can elevate your home barista game. I’ll walk you through my step-by-step process, share tips I’ve picked up along the way, and help you avoid common pitfalls.
Why Learning How to Steam Milk on the Breville Is Essential
Before diving into the details, let’s talk about why learning how to steam milk on the Breville is a game-changer. The Breville espresso machines, known for their reliability and user-friendly design, make it possible to achieve professional results at home. Whether you own the Barista Express, the Bambino, or another model, the steaming wand is your ticket to creamy, frothy perfection.
Whether you own the Barista Express, the Bambino, or another model, the steaming wand is your ticket to creamy, frothy perfection. If you’re considering an upgrade, the Breville Barista Touch Impress Review explores how automation and precise milk frothing technology can make steaming even easier.
Getting Started: Understanding Your Breville Machine
When I first started experimenting with my Breville, understanding the machine’s steaming functions was key. Each Breville model has slight variations, but the fundamentals remain the same:
- Water Tank: Ensure the water reservoir is filled. Without sufficient water, the steam wand won’t work efficiently.
- Steam Wand: This is where the magic happens. The wand is designed to inject steam into the milk, heating and aerating it simultaneously.
- Temperature and Pressure: Breville machines provide consistent steam pressure, which is crucial for proper milk texture.
For those looking for a machine with more precise temperature control, the Breville Dual Boiler BES920XL Review covers a high-performance machine that allows independent control over espresso extraction and steam pressure.
What You Need to Steam Milk on the Breville
To master how to steam milk on the Breville, you’ll need a few essentials:
- Milk: Whole milk works best for frothing due to its higher fat content. For non-dairy options, oat milk tends to produce the creamiest results.
- Milk Jug: A stainless steel pitcher with a spout is ideal for steaming and pouring latte art.
- Thermometer (Optional): If you’re new to steaming, a thermometer can help you hit the ideal milk temperature (between 140°F and 160°F).
If you’re debating which Breville model offers better steaming capabilities, check out our Breville Barista Express Impress vs Pro for a side-by-side comparison of their milk-frothing performance.
Step 1: Preparing the Milk
The first step in learning how to steam milk on the Breville is preparation. Start by pouring cold milk into your steaming pitcher. Aim for about half to three-quarters full to leave room for froth expansion. I always keep my milk and pitcher refrigerated until just before use—it helps achieve a smoother texture.
Step 2: Purging the Steam Wand
Before steaming, it’s essential to purge the steam wand. This step clears out any residual water or milk from previous use, ensuring clean and dry steam. To purge, simply turn the steam knob or press the steam button on your Breville, and let it release steam for a few seconds.
Step 3: Positioning the Milk Jug
Proper positioning is critical when learning how to steam milk on the Breville. Here’s my approach:
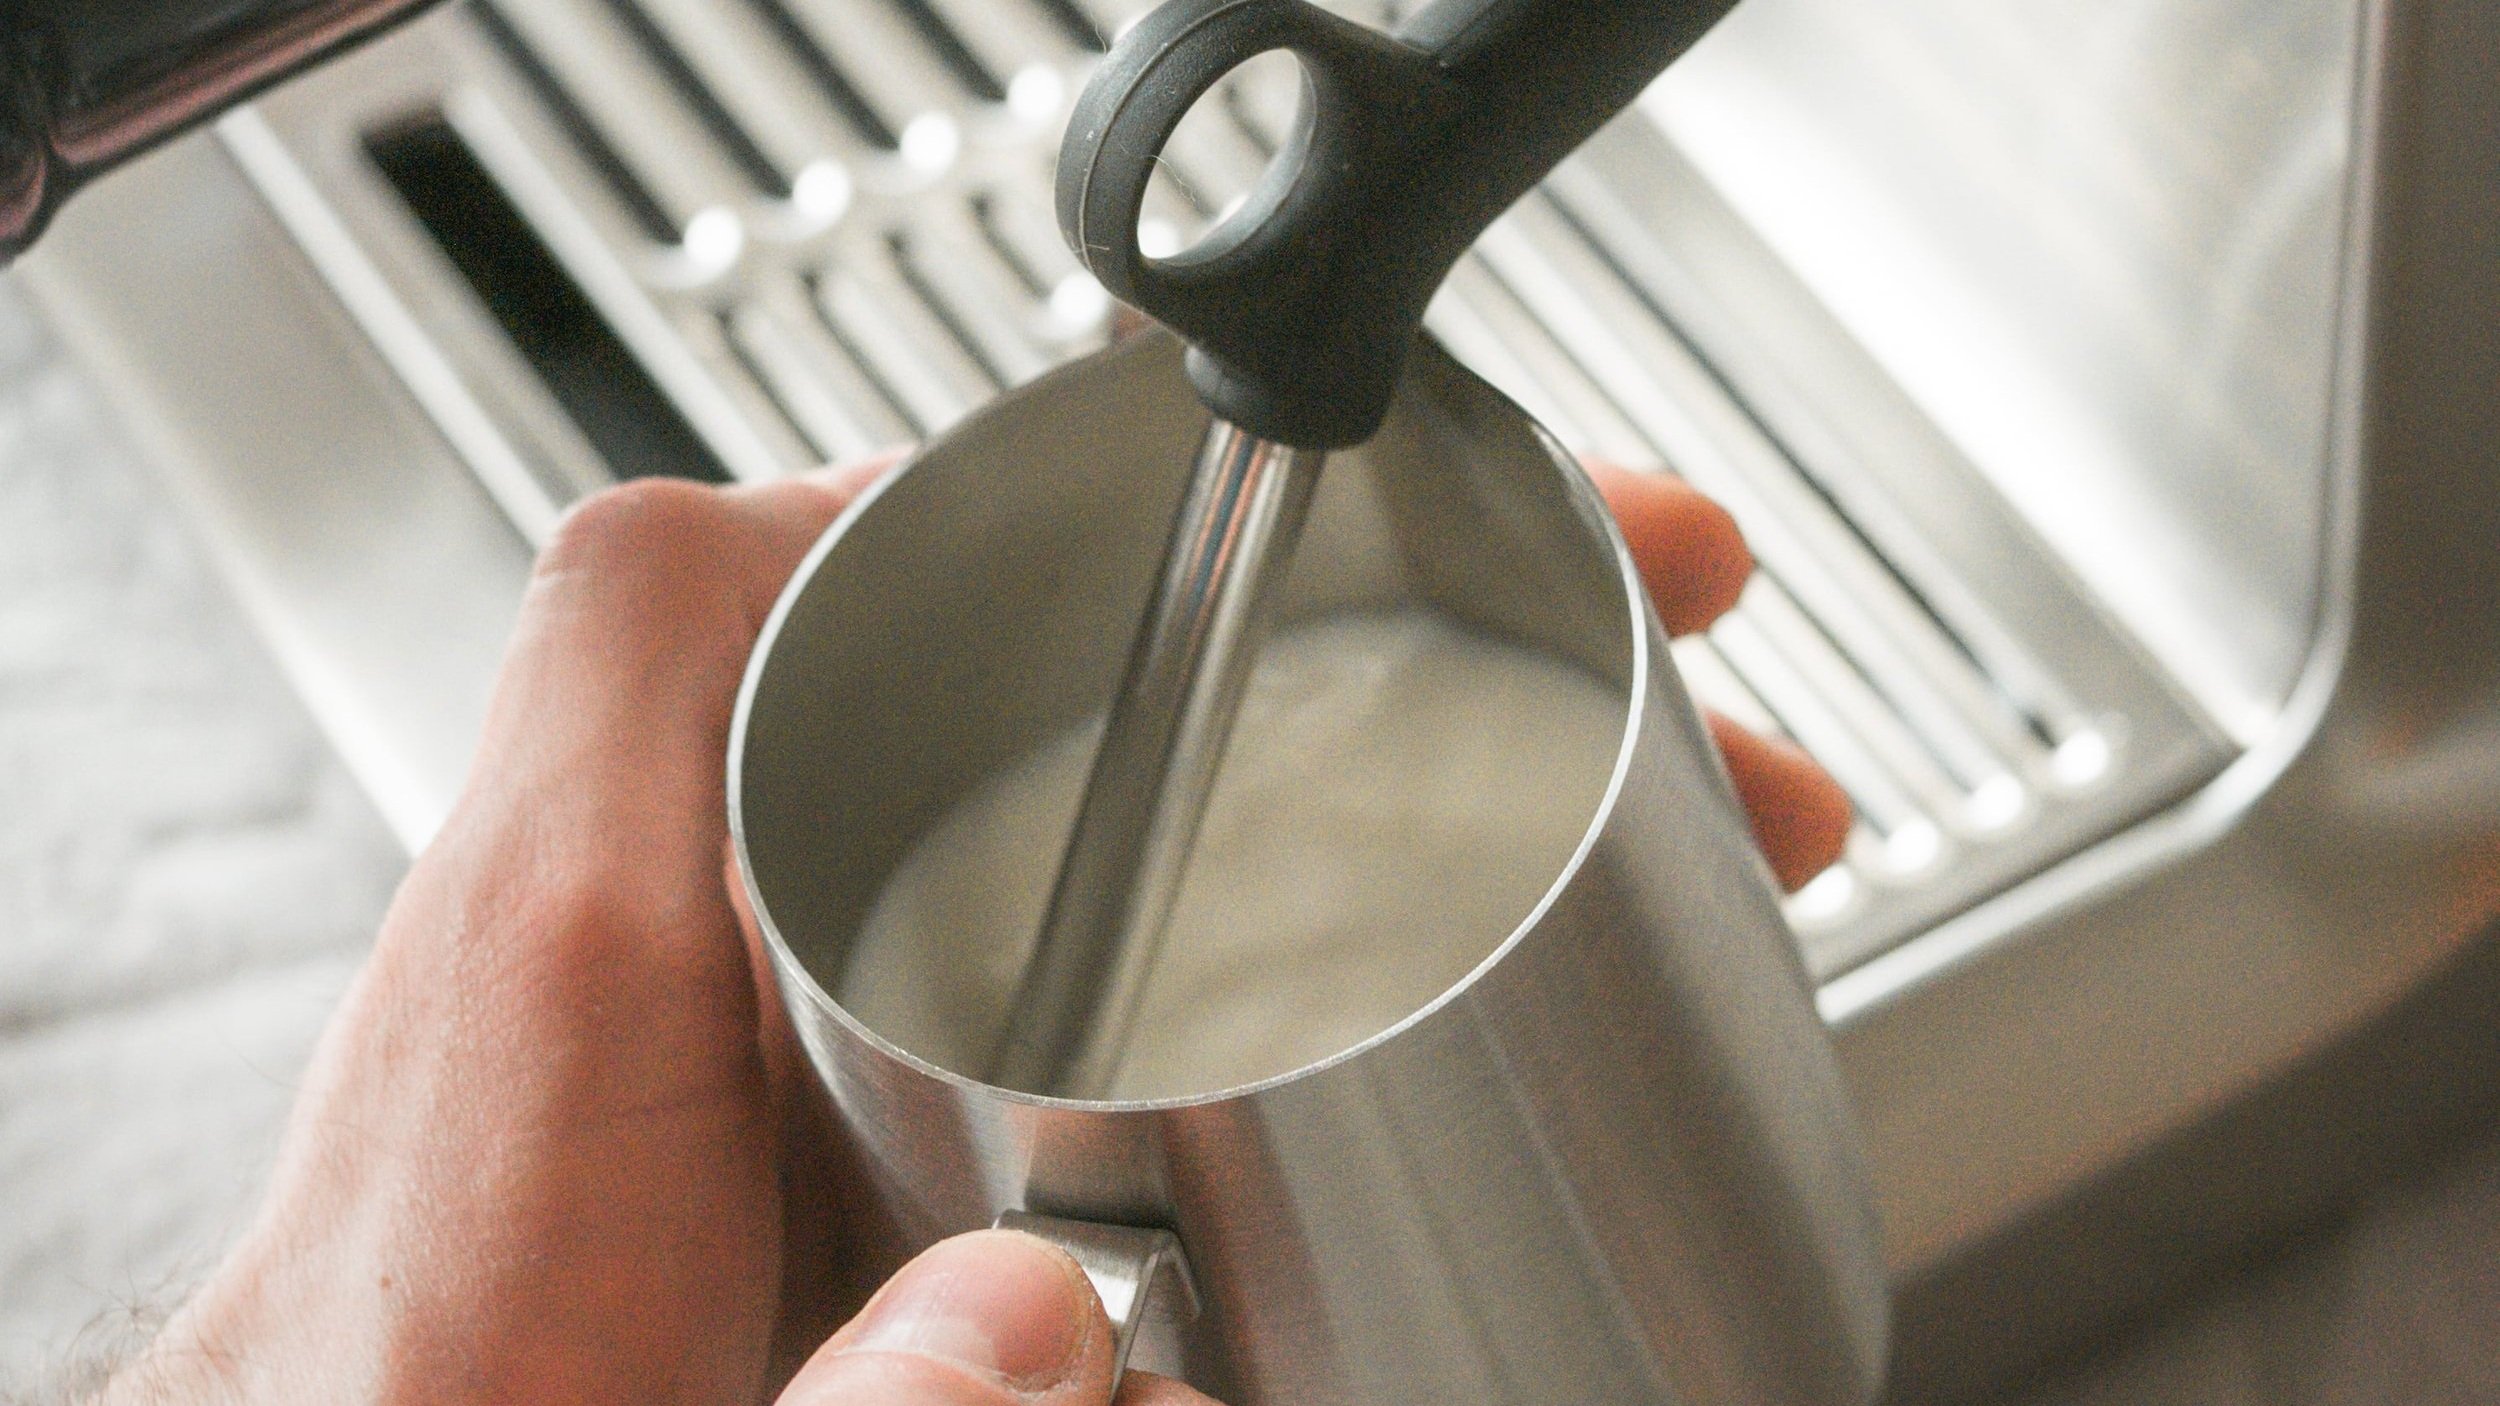
- Angle the Jug: Tilt the milk jug slightly, so the steam wand sits near the side of the pitcher.
- Submerge the Wand Tip: Place the wand tip just below the milk’s surface. This position creates the necessary aeration for frothing.
Step 4: Frothing the Milk
Now, the exciting part—frothing! Here’s how I do it:
- Turn On the Steam: Activate the steam wand and listen for a hissing sound. This indicates the milk is aerating properly.
- Create Microfoam: Lower the jug slightly, allowing air to enter the milk. You’ll notice small bubbles forming, creating a creamy texture.
- Stop Aerating: After a few seconds (about 5–10), submerge the wand deeper to heat the milk without adding more air.
If you’re considering a Breville model with enhanced steam power, check out our Breville Barista Pro vs Express to see which machine delivers faster and more powerful milk steaming.
Step 5: Achieving the Right Temperature
While steaming, keep an eye on the temperature. I like to use my hand as a gauge—if the jug becomes too hot to touch comfortably, the milk is ready. For beginners, a thermometer can ensure you reach the ideal range of 140°F to 160°F. Overheating can scorch the milk, while underheating results in less-than-optimal froth.
Step 6: Perfecting the Milk Texture
The hallmark of well-steamed milk is its texture. When you’ve mastered how to steam milk on the Breville, your milk should have a glossy, velvety consistency. If the surface looks bubbly, tap the jug gently on the counter and swirl it to integrate the foam.

Troubleshooting Common Issues When Steaming Milk on the Breville
When I first started, I encountered my fair share of challenges. Here are some tips for overcoming common issues:
- Too Many Large Bubbles: This usually means the steam wand tip was too high above the milk’s surface. Adjust the position to create smaller bubbles.
- No Foam: If your milk isn’t frothing, ensure the steam wand is injecting air during the initial phase.
- Overheated Milk: Keep an eye on the temperature, as overheated milk loses its sweetness and texture.
For those interested in fully automated steaming, our Breville Oracle vs Oracle Touch comparison breaks down the differences in their hands-free milk frothing systems.
Advanced Tips for How to Steam Milk on the Breville
Once you’ve nailed the basics, here are some advanced techniques to take your skills to the next level:
- Practice Latte Art: With perfectly steamed milk, you can create beautiful patterns like hearts and rosettas. It’s all about the pour technique.
- Experiment with Milk Types: Try different kinds of milk to see how they froth. Each variety brings unique flavors and textures.
- Customize Your Froth: Depending on your drink, you can adjust the amount of foam. Cappuccinos need more foam, while lattes require a creamier texture.
Cleaning the Steam Wand After Use
A clean steam wand is vital for maintaining your Breville machine. After steaming, immediately purge the wand to remove any milk residue. Then, wipe it down with a damp cloth. Trust me—this small step saves a lot of trouble later.
Why Consistency Matters in Steaming Milk
As I practiced how to steam milk on the Breville, I realized consistency is key. Every step, from milk preparation to steam wand positioning, affects the final result. By paying attention to these details, you can replicate great results every time.
Personal Lessons from My Steaming Journey
When I first started steaming milk on my Breville, I was intimidated by the process. Over time, I discovered that patience and practice are crucial. Don’t be discouraged by early mistakes—each one teaches you something valuable.
Pairing Steamed Milk with Espresso Drinks
Once you’ve mastered how to steam milk on the Breville, you can create a variety of drinks:
- Lattes: Combine steamed milk with a shot of espresso for a creamy delight.
- Cappuccinos: Use a higher foam-to-milk ratio for a classic cappuccino.
- Flat Whites: Achieve a silky smooth texture by minimizing foam and emphasizing microfoam.
Final Thoughts: How to Steam Milk on the Breville Like a Pro
Learning how to steam milk on the Breville is a rewarding journey. With practice, you’ll enjoy barista-quality drinks at home, impressing yourself and your guests. Remember, the key is to embrace the process, experiment, and have fun.
Now it’s your turn to grab your Breville, a steaming pitcher, and your favorite milk. Start practicing, and soon you’ll be enjoying a perfectly crafted latte or cappuccino in the comfort of your own kitchen!
Frequently Asked Questions
What’s the Best Milk for Steaming?
Whole milk is ideal for creating rich, creamy foam, but barista-grade oat or almond milk works wonderfully for non-dairy alternatives.
Why Isn’t My Milk Frothing?
Make sure you’re using cold milk and positioning the steam wand just beneath the surface. Also, remember to purge the wand before you begin.
How Can I Tell When the Milk Is Ready?
The milk should reach around 150°F (65°C). If you don’t have a thermometer, stop steaming when the pitcher feels too hot to hold comfortably.
Can I Use Non-Dairy Milk?
Yes, barista versions of oat and almond milk are specially designed for frothing and yield excellent results.
How Do I Avoid Large Bubbles?
To achieve a smoother texture, make sure the steam wand is angled properly, which helps break down large bubbles.